diy koi pond

Creating Your Own DIY Koi Pond: A Step-by-Step Guide

diy koi pond
Creating Your Own DIY Koi Pond: A Step-by-Step Guide 4

Introduction to DIY Koi Ponds

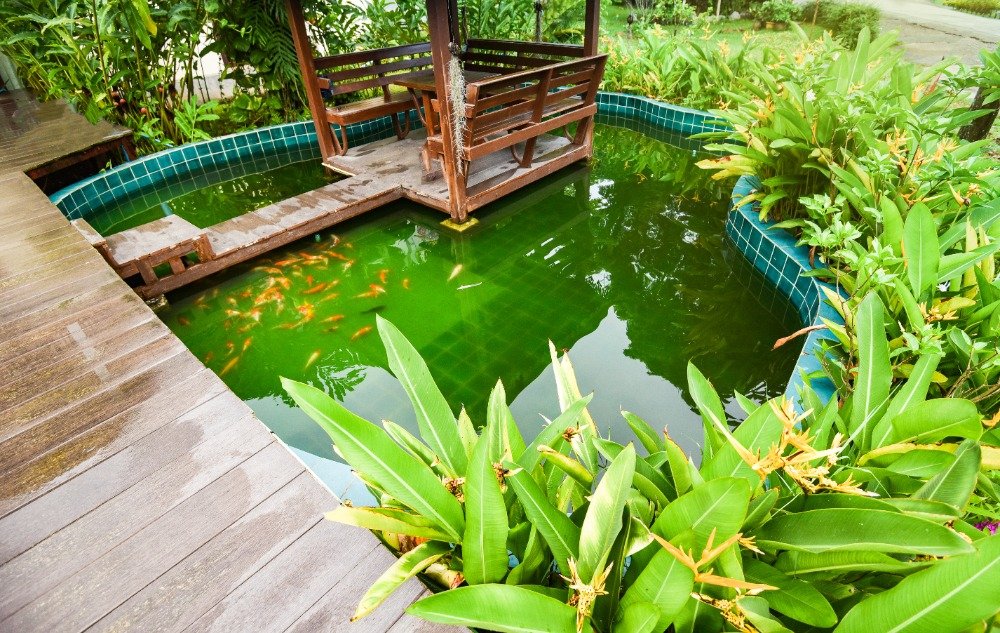
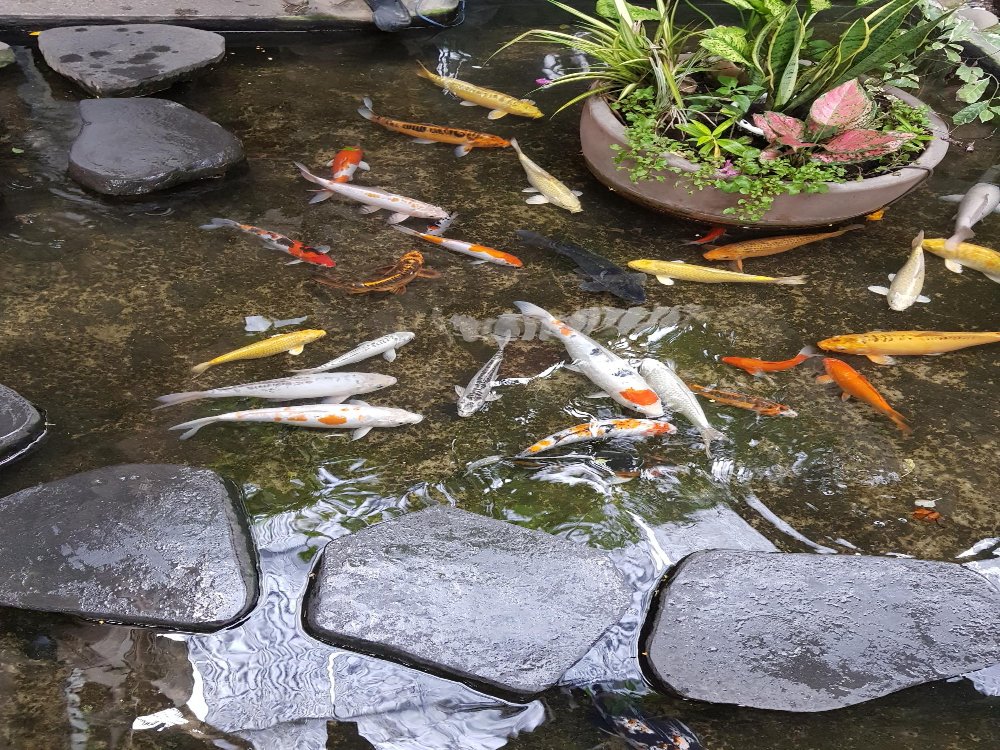
Creating a DIY koi pond is an enriching project that offers both aesthetic and emotional rewards. A koi pond can transform your backyard into a serene oasis, elevating the overall ambiance of your outdoor space. The combination of the shimmering water, vibrant koi fish, and lush aquatic plants creates a tranquil environment that is both visually captivating and soothing to the soul. This is one of the many reasons why koi ponds are increasingly popular among garden enthusiasts and homeowners alike.

Building your own koi pond allows you to customize every detail to fit your personal tastes and landscape design. The process itself is a rewarding experience, offering a sense of accomplishment and a deeper connection to nature. Beyond aesthetics, a koi pond can also serve as a focal point for outdoor gatherings, offering a unique and engaging element that captivates guests. The gentle sound of water and the graceful movements of koi fish can add a meditative quality to your garden, promoting relaxation and well-being.

The benefits of having a koi pond extend beyond visual appeal and tranquility. Engaging in the maintenance and care of a koi pond fosters a sense of responsibility and provides a fulfilling hobby. Observing the lifecycle of koi fish and the growth of aquatic plants can be both educational and therapeutic. Moreover, a well-maintained koi pond enhances the biodiversity of your garden, attracting various forms of wildlife, from dragonflies to birds, thereby enriching your overall outdoor ecosystem.

In essence, a DIY koi pond offers a unique blend of beauty, tranquility, and personal satisfaction. Whether you are a seasoned gardener or a beginner looking to embark on a new project, constructing and maintaining a koi pond can be a deeply fulfilling endeavor. With careful planning and a bit of effort, you can create a stunning aquatic haven right in your backyard.

Planning Your Koi Pond

When embarking on the journey of creating a DIY koi pond, meticulous planning is paramount. The first step involves selecting an ideal location. The chosen spot should receive adequate sunlight, ideally between four to six hours daily, as sunlight is essential for the health of the koi and the aquatic plants. However, excessive sunlight can lead to algae overgrowth, so partial shade is also beneficial. Proximity to trees should be avoided, as falling leaves can contaminate the water and increase maintenance efforts.

The size and depth of your koi pond are crucial considerations. A pond should be at least three feet deep to provide sufficient space for the koi to swim freely and to prevent predators from easily accessing the fish. Additionally, adequate depth helps maintain a stable water temperature, which is vital for the health of your koi, especially during extreme weather conditions. The surface area of the pond will determine the number of koi you can keep; as a general rule, each adult koi requires about 250 gallons of water.

Before breaking ground, it is essential to check local regulations and obtain any necessary permits. Some municipalities have specific requirements regarding pond construction, including setbacks from property lines and fencing to ensure safety. Consulting with local authorities will help you avoid potential legal issues and ensure your pond complies with all regulations.

In summary, the planning phase is a critical component of a successful koi pond project. By carefully selecting the location, considering the size and depth, and adhering to local regulations, you lay the groundwork for a thriving aquatic environment. With these foundational elements in place, you can proceed confidently to the next stages of creating your DIY koi pond.

Gathering Materials and Tools

Constructing a diy koi pond requires a thoughtful selection of materials and tools to ensure a thriving aquatic environment. The foundational element is the pond liner, a crucial component that prevents water leakage and maintains the pond’s structural integrity. Opt for high-quality, durable liners made of EPDM or PVC, as these materials are flexible, resistant to UV rays, and can withstand various weather conditions.

Pumps are another essential item, responsible for maintaining water circulation, which is vital for the health of your koi. When choosing a pump, consider the size of your pond. An appropriately sized pump ensures efficient water flow and oxygenation, promoting a healthy habitat for your fish. Submersible and external pumps are the most common types; the choice depends on your pond’s design and your maintenance preferences.

Filters work hand-in-hand with pumps to maintain water quality. They remove debris, excess nutrients, and harmful substances, fostering a clean and balanced ecosystem. Biological and mechanical filters are the two primary types to consider. A biological filter supports beneficial bacteria that break down waste, while a mechanical filter traps physical particles. A combination of both offers optimal results.

Incorporating skimmers into your diy koi pond helps manage surface debris such as leaves and dust. Skimmers are installed at the pond’s edge and function by drawing water from the surface, capturing floating debris before it sinks and contaminates the water. This not only keeps your pond clean but also reduces maintenance efforts.

Rocks and plants are not just aesthetic additions but also play functional roles. Rocks provide hiding spots and breeding grounds for koi, while aquatic plants contribute to the pond’s ecological balance. Plants like water lilies offer shade, reducing algae growth, and improve water quality by absorbing nitrates. Choose non-toxic, koi-friendly plants to ensure a harmonious environment.

Carefully selecting these materials and tools will set a solid foundation for your diy koi pond, ensuring its longevity and the well-being of its inhabitants. Investing in high-quality items and understanding their purposes will result in a beautiful and sustainable aquatic sanctuary.

Excavating and Preparing the Site

Embarking on the creation of a DIY koi pond begins with the crucial step of excavating and preparing the site. Start by marking the pond shape on the ground. Utilize stakes and a rope or a garden hose to outline the desired perimeter. This initial step ensures a clear visual of the pond’s layout and helps in maintaining precision during excavation.

Once the shape is defined, proceed to dig the pond area. For optimal koi pond conditions, dig to a depth of at least three feet. This depth is essential to maintain stable water temperatures and provide adequate space for the koi to thrive. While digging, create shelves around the perimeter of the pond. These shelves, typically 8-12 inches deep, are essential for placing aquatic plants that contribute to the pond’s ecosystem.

As you excavate, pay attention to the removal of any sharp objects such as rocks, roots, or debris. These objects pose a significant threat to the pond liner, which could lead to leaks and maintenance issues. A smooth, even surface is imperative. After the major debris is cleared, use a rake to level the bottom and sides of the excavation site. For added protection, consider placing a layer of sand or underlayment before installing the liner. This additional layer acts as a cushion, further safeguarding the liner from potential damage.

By meticulously following these steps, the foundation of your DIY koi pond will be well-prepared, setting the stage for a thriving aquatic habitat. Attention to detail during this phase ensures the longevity and health of the pond, allowing you to enjoy a serene and beautiful water feature in your garden.

Installing the Pond Liner

Installing the pond liner is a critical step in creating your DIY koi pond, as it ensures the pond retains water and provides a stable environment for your koi fish. Begin by measuring the dimensions of your pond, taking into account the depth, length, and width. These measurements will help you determine the size of the liner needed. It’s advisable to add an extra 2-3 feet to your measurements to account for any overlap and anchoring around the edges.

Once you have the correct size liner, carefully unfold it and position it over your pond. Start by placing the liner at the center of the pond and gradually spread it out towards the edges. Ensure that the liner evenly covers the entire pond, avoiding any sharp objects or rocks that could puncture it. As you spread the liner, smooth out any wrinkles or folds to create a seamless surface. This process may require some assistance, as larger liners can be cumbersome to handle alone.

Properly securing the liner is crucial to prevent it from shifting or tearing over time. Begin by anchoring the liner around the perimeter of the pond using rocks or heavy objects. Place the rocks on the liner’s edges, ensuring they are evenly distributed to hold the liner in place. For additional security, you can also use landscaping staples or U-shaped pins to fasten the liner to the ground. Be cautious not to puncture the liner when using these tools.

Once the liner is securely anchored, you can trim any excess material around the edges, leaving enough overlap to tuck under rocks or soil. This overlap will help maintain the liner’s position and provide a more natural appearance. With the liner in place, you can begin filling your DIY koi pond with water, monitoring for any shifts or wrinkles that may need further adjustment.

By following these steps, you can ensure a smooth and secure installation of your pond liner, creating a solid foundation for your koi pond. This careful attention to detail will contribute to the longevity and success of your aquatic haven.

Setting Up the Filtration System

A well-designed filtration system is paramount to the success of your DIY koi pond, as it ensures clean and healthy water for your fish. The filtration system helps to remove debris, excess nutrients, and harmful toxins, thus creating a balanced aquatic environment. Without an efficient filtration system, your pond water can quickly become polluted, leading to poor fish health and unsightly water conditions.

To set up your filtration system, start by installing the pump. The pump is essential for circulating water through the filter and skimmer. Choose a pump that matches the size of your pond and the flow rate required for optimal filtration. Position the pump at the deepest part of the pond to ensure maximum water circulation.

Next, install the filter. There are two main types of filters: mechanical and biological. Mechanical filters trap debris and particles, while biological filters house beneficial bacteria that break down harmful ammonia and nitrites. Some systems combine both types for more effective filtration. Place the filter in an accessible location for easy maintenance. Connect the pump to the filter using appropriate tubing, ensuring all connections are secure to prevent leaks.

An essential component of the filtration system is the skimmer, which removes floating debris before it sinks to the bottom. Install the skimmer at the water’s surface, ideally at the pond’s edge where it can effectively collect leaves and other debris. The skimmer should be connected to the pump to ensure continuous water flow.

When choosing the best filtration system for your koi pond, consider the pond size, the number of fish, and the specific needs of your aquatic environment. Pressurized filters are suitable for larger ponds, as they can handle higher water volumes and provide superior filtration. Gravity-fed filters are often preferred for smaller ponds due to their energy efficiency and ease of maintenance. Additionally, UV clarifiers can be integrated into the system to control algae growth and maintain crystal-clear water.

By following these steps and selecting the appropriate filtration components, you can create a thriving DIY koi pond with pristine water quality, ensuring the health and vitality of your koi fish.

Adding Plants and Landscaping

When designing a DIY koi pond, incorporating aquatic plants is essential for both the health of the pond and its visual appeal. Aquatic plants play a critical role in maintaining water quality by absorbing excess nutrients that could otherwise lead to algae blooms. Additionally, they provide shelter and breeding areas for koi, enhancing their overall habitat.

When selecting plants for your koi pond, consider a mix of submerged, floating, and marginal plants. Submerged plants like anacharis and hornwort are excellent for oxygenating the water. Floating plants such as water lilies and water lettuce provide shade, reducing sunlight penetration and helping to control algae growth. Marginal plants, including cattails and irises, can be placed around the pond’s edges to create a natural transition between water and land.

Planting should be done thoughtfully to ensure both aesthetic value and ecological balance. Group plants with similar needs together and ensure they have adequate space to grow. Floating plants can be placed directly on the water surface, while submerged plants should be anchored in pots with gravel to prevent them from being uprooted by active koi. Marginal plants can be planted in shallow areas or in pots placed at various depths along the pond’s edge.

Landscaping around your DIY koi pond is equally important for creating a cohesive and visually appealing environment. Use a variety of rocks, stones, and gravel to form natural-looking boundaries and pathways. Incorporate native plants and shrubs to blend the pond seamlessly with the surrounding landscape. Consider adding a waterfall or stream to enhance the sensory experience and improve water circulation.

Proper planning and thoughtful selection of plants and landscaping elements will not only enhance the beauty of your koi pond but also contribute to a thriving ecosystem for your koi. By integrating diverse plant species and natural elements, you can create a serene and sustainable aquatic habitat.

Introducing Koi Fish and Regular Maintenance

Introducing koi fish to your newly constructed DIY koi pond requires careful planning and execution to ensure the health and well-being of the fish. Begin by ensuring that the water parameters in the pond are optimal. The pH level should be between 7.0 and 8.5, and the water temperature should be gradually adjusted to match the conditions the koi are accustomed to. It’s advisable to float the bag containing the koi on the pond’s surface for about 15-20 minutes. This allows the water temperatures to equalize, minimizing the risk of thermal shock.

When it comes to the initial population, start with a modest number of koi fish. A good rule of thumb is to introduce no more than three to five fish initially, especially if your pond is less than 1,000 gallons. As the fish acclimate and the biological filtration system establishes itself, you can gradually increase the number of koi. Keep in mind that koi can grow quite large, so providing ample space is crucial for their health and growth.

Regular maintenance of your DIY koi pond is essential for sustaining a healthy environment for your fish. One critical task is feeding the koi. Feed them a high-quality koi food, and be mindful not to overfeed, as excess food can deteriorate water quality. It is best to feed them once or twice a day, giving them only what they can consume within five minutes.

Cleaning the pond filter is another vital maintenance task. Weekly checks and cleaning will ensure that the filter operates efficiently, removing debris and maintaining clear water. Additionally, regularly testing the water quality for ammonia, nitrites, and nitrates is imperative. Employ appropriate treatments to rectify any imbalances promptly.

Seasonal care is also an important aspect of maintaining a DIY koi pond. During winter, ensure that the pond does not freeze over completely, as koi need oxygen to survive. A pond heater or de-icer can help maintain an open area on the pond’s surface. In the spring and fall, perform partial water changes to remove accumulated toxins and refresh the water.