

How to Breed Koi Fish: Complete Step-by-Step Guide
By Giovanni Carlo · Koi keeper & breeder, Giobel Koi Center · Updated June 9, 2026

Quick Answer
To breed koi fish: (1) select healthy parents aged 3–6 years with desired traits, (2) condition them with high-protein food for 4–6 weeks, (3) set up a dedicated breeding pond with spawning ropes at 68–72°F, (4) remove adults immediately after spawning — koi eat their own eggs, (5) incubate eggs for 3–7 days, (6) feed fry through a staged diet from infusoria to brine shrimp to micro-pellets, (7) cull weak and deformed fry at 4–6 weeks. A single spawning can produce 100,000–500,000 eggs.
In This Guide
- Koi Breeding Overview
- Step 1 — Parent Selection
- Step 2 — Pre-Spawn Conditioning
- Step 3 — Breeding Pond Setup
- Step 4 — Triggering & Observing Spawning
- Step 5 — After Spawning: Protecting the Eggs
- Step 6 — Egg Incubation
- Step 7 — Fry Care & Feeding
- Fry Development Timeline
- Culling: The Most Important Step Most Beginners Skip
- Koi Genetics Basics for Breeders
- Common Breeding Problems & Solutions
- Frequently Asked Questions
Koi Breeding Overview
Breeding koi is one of the most rewarding experiences in the hobby — and one of the most humbling. A single successful spawning can produce hundreds of thousands of eggs. From those, a serious hobbyist might raise 50–200 quality fish to the 4-inch stage. A professional Japanese breeder in Niigata might cull 95% of those to find the 2–3 exceptional specimens worth grow-out investment.
Understanding this reality before you begin sets the right expectations: koi breeding is not a guaranteed process, and success is measured not by how many fry you produce but by the quality of what survives your selection process.

| Stage | Timeframe | Key Action |
|---|---|---|
| Parent selection & conditioning | 4–6 weeks before spawning | High-protein feeding, water changes, observation |
| Breeding pond setup | 1–2 weeks before spawning | Install spawning ropes, cycle filter, raise temp |
| Spawning | 1–3 days (at dawn) | Monitor, remove adults after completion |
| Egg incubation | 3–7 days | Maintain temp, remove white (dead) eggs |
| Sac fry (larvae) | Days 1–3 post-hatch | No feeding — fry absorb yolk sac |
| Free-swimming fry | Days 3–30 | Infusoria → brine shrimp → powdered food |
| First culling | Weeks 4–6 | Remove deformed, weak, and undesirable fry |
| Grow-out | Months 2–12+ | Regular culling, feeding, water quality management |
Step 1 — Parent Selection
The quality of your breeding stock determines the ceiling for everything that follows. No amount of perfect water chemistry or expert fry-rearing can compensate for genetically poor parents. This is where the entire project succeeds or fails.
Selecting Female Koi (Tosai or older)
- Age: 3–6 years old is ideal. Females mature sexually at 3 years — younger females produce fewer eggs and handle the physical stress of spawning less well. Over 8 years, egg quality and quantity begin to decline.
- Size: At least 12–14 inches (30–35 cm). Smaller females should not be bred — the physical demand of carrying and releasing hundreds of thousands of eggs is significant.
- Body condition: A clear, symmetrical swelling on both sides of the abdomen indicates a female full of eggs and ready to spawn. The belly should feel rounded and firm — not hard or asymmetrical (which can indicate egg binding or disease).
- Health: No visible disease, fin damage, ulcers, or behavioral abnormalities. Only breed from fish that have been healthy for at least 6 months without chemical treatment.
- Desired traits: Clear, vivid coloration; well-defined pattern (for patterned varieties); deep body; strong tail peduncle. Remember: traits are not guaranteed to pass to offspring, but parents with desirable traits have a higher probability of producing offspring with those traits.
Selecting Male Koi
- Age: 2–6 years. Males mature earlier than females — sexually active from around 2 years. For best results use males 3+ years old.
- Ratio: Use 2–3 males per female. Multiple males improve fertilization rates significantly — each male fertilizes a different portion of the eggs as the female releases them, and competition between males increases sperm quality.
- Breeding tubercles: During breeding season, quality males develop small white bumps (tubercles) on their gill plates and pectoral fin leading rays — this confirms sexual readiness. See our guide: How to Tell Male from Female Koi.
- Vigor: Males that actively chase females during early pre-spawning activity are the most fertile and ready to breed. Passive males may have lower sperm quality.
Avoid Inbreeding
Never breed siblings — inbreeding in koi leads to increased rates of deformity, reduced immune function, and declining color quality over generations. If possible, use males and females from different bloodlines. Professional breeders in Niigata go to great lengths to maintain genetic diversity across their breeding programs.
Step 2 — Pre-Spawn Conditioning
Conditioning is the 4–6-week period before breeding when you actively prepare your parent fish for the physical demands of spawning. Well-conditioned parents produce more eggs, stronger sperm, and healthier fry. Poorly conditioned parents produce weak spawns.
- High-protein diet: Switch to a koi food with 40%+ protein content. Feed 3–4 times daily, applying the strict 5-minute rule. For premium conditioning, supplement with live or frozen brine shrimp or bloodworms 2–3 times per week. See: Koi Fish Food: Complete Guide.
- Water quality: Perform 20–25% water changes weekly throughout the conditioning period. Ammonia and nitrite must be 0 ppm. Test every 3–4 days. Excellent water quality is the single most important environmental factor for egg and sperm development.
- Temperature: Keep water at 65–72°F (18–22°C) during conditioning. Avoid temperature swings above 5°F in a 24-hour period.
- Separate the sexes: Many experienced breeders keep males and females in separate ponds for 2–3 weeks before breeding, then introduce them together in the breeding pond. This separation builds spawning drive and often results in more vigorous and complete spawning.
- Health check: Treat any existing health issues before conditioning. Never breed fish within 6 weeks of antibiotic or antiparasitic treatment.
Step 3 — Breeding Pond Setup
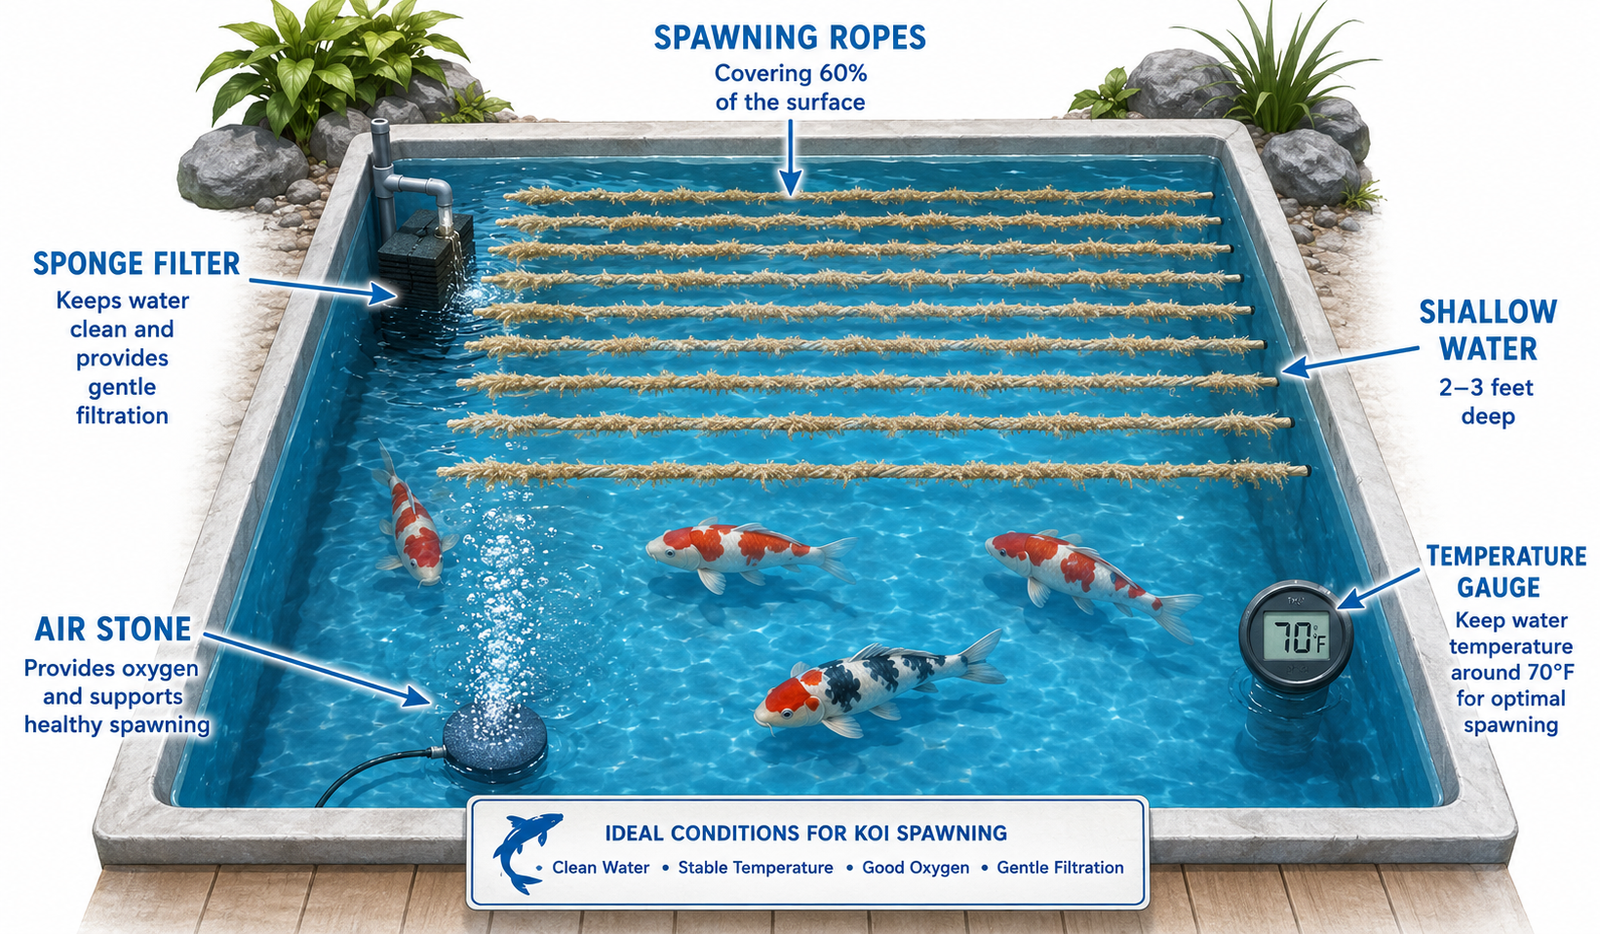
The breeding pond is a separate, dedicated space distinct from your main display pond. It serves three purposes: a controlled spawning environment, a place to protect eggs from other fish, and an easy-to-monitor space for the critical first hours after spawning.
| Parameter | Requirement | Reason |
|---|---|---|
| Volume | 1,000–2,000 gallons | Enough room for vigorous spawning activity without injury |
| Depth | 2–3 feet (60–90 cm) | Shallow enough for active surface spawning; easier egg observation |
| Spawning media | Spawning ropes / brushes / fine-leaved plants | Eggs are adhesive — they need surfaces to attach to |
| Coverage | 50–70% of pond surface with spawning media | More surface area = more eggs retained; less lost to pond floor |
| Filtration | Gentle — sponge filter only | Strong flow can damage eggs and fry; sponge filter is safe |
| Aeration | Strong — air stones throughout | Eggs and fry have high oxygen demands; aeration is critical |
| Water temperature | 68–72°F (20–22°C) | Optimal spawning temperature; below 65°F slows or stops spawning |
Spawning ropes vs natural plants: Synthetic spawning ropes (available from koi suppliers) are the professional choice — they are easy to move with eggs attached, simple to clean between uses, and don’t introduce disease. Fine-leaved aquatic plants (hornwort, water sprite) work well but can be harder to manage and may harbor parasites. For a first breeding, synthetic spawning ropes are strongly recommended.
Step 4 — Triggering & Observing Spawning
Natural Spawning Triggers
Koi spawn in response to specific environmental cues. Understanding these helps you time breeding precisely:
- Rising water temperature: The most reliable trigger. Move conditioned fish to the breeding pond when water temperature is 65–68°F and rising. The temperature increase itself — not just the temperature — signals spawning readiness.
- Dawn and early morning light: Koi almost always spawn at dawn — the change from darkness to first light combined with cooler morning temperatures consistently triggers spawning behavior. Introduce fish to the breeding pond in late afternoon so they have an overnight settling period before spawning at dawn.
- After a water change: Performing a 25–30% water change with slightly cooler water in the breeding pond the evening before intended spawning often triggers morning spawning. The temperature differential mimics rainfall — a natural spawning trigger.
What to Expect During Spawning
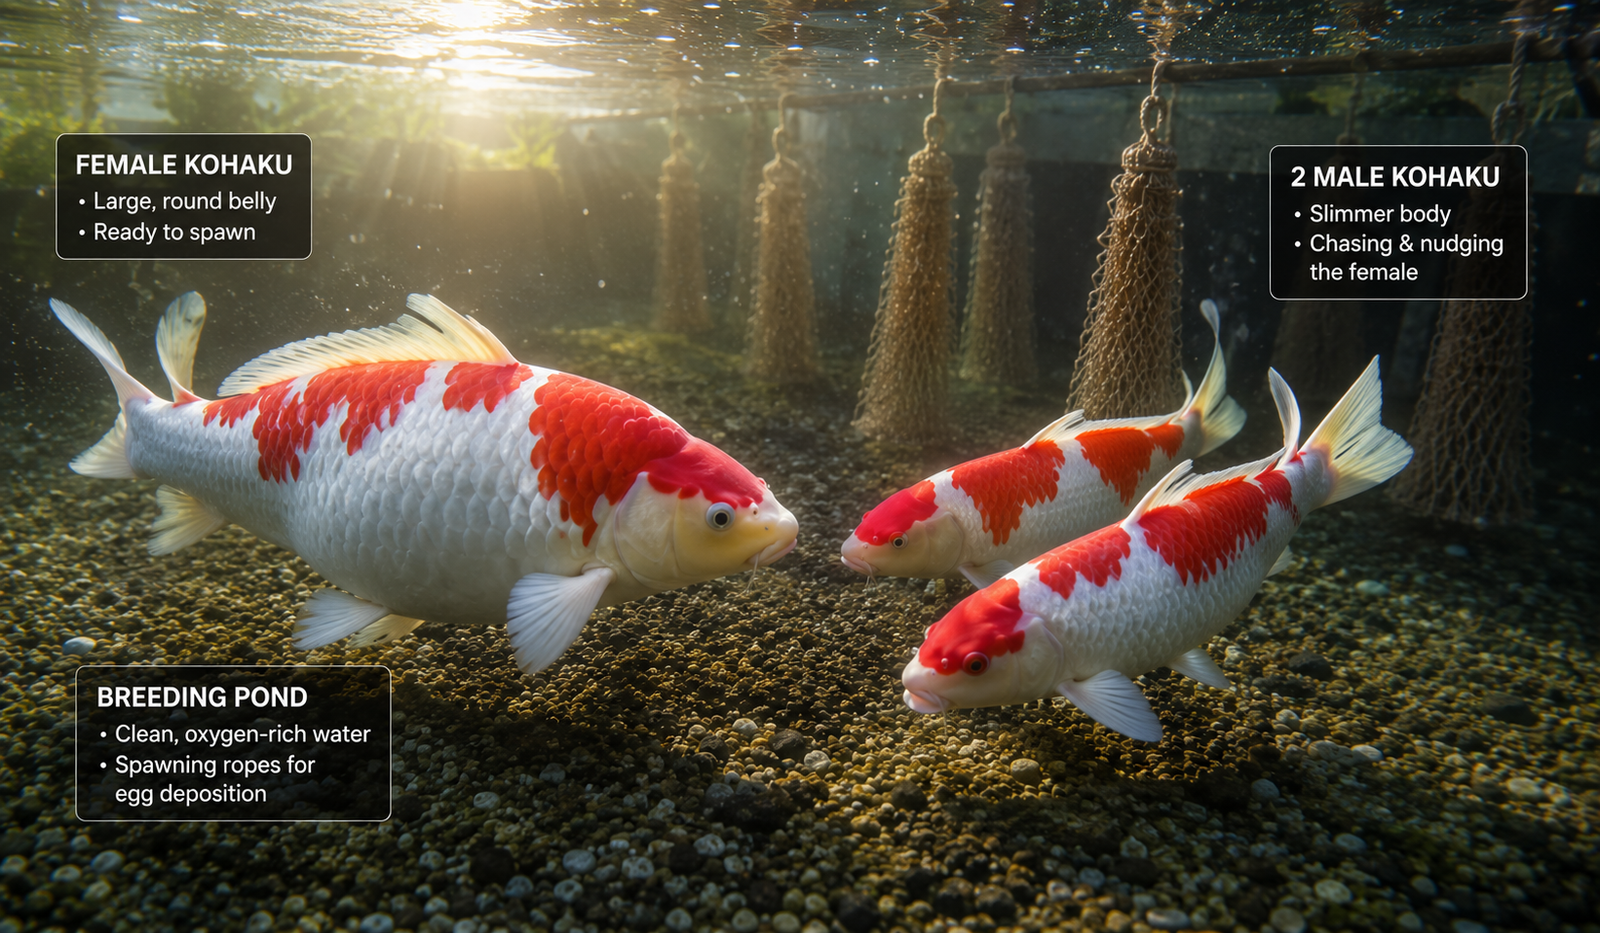
- Males begin following and nudging the female’s abdomen the evening before spawning
- Chasing intensifies at dawn — multiple males may pursue a single female simultaneously
- The female moves toward the spawning ropes and shallow areas
- Eggs are released in small batches as males nudge the female repeatedly — fertilization is external
- Adhesive eggs immediately attach to spawning ropes, plants, and any surface they contact
- Active spawning lasts 2–6 hours; the pond looks frothy with expelled milt (sperm)
- Total spawning time per pairing: typically one morning, sometimes continuing to the following dawn
From My Breeding Experience
On my farm in Mindanao, I typically introduce the breeding group to the spawning pond in late afternoon. By 5–6 AM the following morning, spawning is usually in full activity. The male chasing is vigorous and can look alarming — the female is being pushed hard against surfaces. This is normal. I monitor for about an hour without intervening, then check spawning ropes for adhesive eggs. Once eggs are clearly visible on the ropes, I begin watching for spawning to complete so I can remove the adults promptly.
Step 5 — After Spawning: Protecting the Eggs
Critical — Act Within 30 Minutes
Remove all adult koi from the breeding pond immediately after spawning. Koi have zero parental instinct — they will eat every egg and fry they can find. Even 30 minutes of delay can result in the loss of most eggs. This is the single most common cause of failed koi breeding for beginners.
Post-spawning protocol:
- Remove males first — return to the main pond or a holding tank
- Remove the female carefully — she will often be physically exhausted and may have minor abrasions from the spawning activity. Move her to a clean recovery tank with gentle filtration and add 0.1% aquarium salt to support healing.
- Add a small amount of methylene blue (at the manufacturer’s recommended dose) to the breeding pond water — this antifungal treatment reduces egg losses to fungal infection without harming fertilized eggs. Not essential but significantly improves hatch rates.
- Remove spawning ropes carefully if you intend to incubate eggs separately in a hatching tank. Handle gently to avoid dislodging eggs.
- Continue strong aeration — eggs require high oxygen levels throughout incubation.
Step 6 — Egg Incubation
Koi eggs are semi-transparent and adhesive — they attach to surfaces and can be clearly seen with the naked eye. Understanding the difference between fertilized and unfertilized eggs is critical for managing the incubation period.
✅ Fertilized eggs
- Clear to pale amber/yellow
- Slightly transparent — you can see the embryo developing inside
- Remain attached to spawning media
- Develop dark spot (eye) within 24–48 hours
❌ Unfertilized eggs
- Turn opaque white within 12–24 hours
- May develop fuzzy white fungal growth
- Can spread fungus to adjacent fertilized eggs
- Remove white eggs as soon as noticed
| Water Temperature | Days to Hatch | Notes |
|---|---|---|
| 65°F / 18°C | 5–7 days | Slow incubation; increased fungus risk |
| 68°F / 20°C | 4–5 days | Good; lower fungus risk |
| 72°F / 22°C ✦ Optimal | 3–4 days | Best balance of speed and embryo health |
| 77°F / 25°C | 2–3 days | Fast; monitor carefully — overheating risk |
Step 7 — Koi Fry Care & Feeding
The first 30 days of a koi fry’s life are the most demanding for the breeder — and the period of highest natural mortality. Getting through this stage requires consistent feeding, excellent water quality, and close daily observation.
Fry Feeding Schedule
| Age | Stage | Food | Frequency |
|---|---|---|---|
| Days 1–3 | Sac fry / larvae | No feeding — absorbing yolk sac | None |
| Days 3–7 | Newly free-swimming | Infusoria, green water, liquid fry food | 5–8× daily |
| Days 7–14 | Growing fry | Newly hatched brine shrimp + powdered fry food | 5–6× daily |
| Days 14–30 | Juvenile fry | Powdered fry food + micro-pellets | 4–5× daily |
| Days 30–60 | Post-cull juveniles | Micro-pellets + crushed standard koi pellets | 3–4× daily |
| 60+ days | Young koi | Standard small koi pellets | 2–3× daily (5-minute rule) |
Water Quality During Fry Rearing
Fry are far more sensitive to water quality than adult koi. Ammonia above 0.25 ppm is lethal to newly hatched fry. Daily partial water changes (10–15% daily) and frequent testing are non-negotiable during the first 30 days:
- Test ammonia and nitrite every day for the first 2 weeks
- Change 10–15% of water daily using dechlorinated water matched to tank temperature
- Use only a gentle sponge filter — power filters can suck up fry
- Keep aeration strong throughout — fry have high oxygen demands
- Never overfeed — uneaten food rapidly spikes ammonia in a small fry pond
Koi Fry Development Timeline
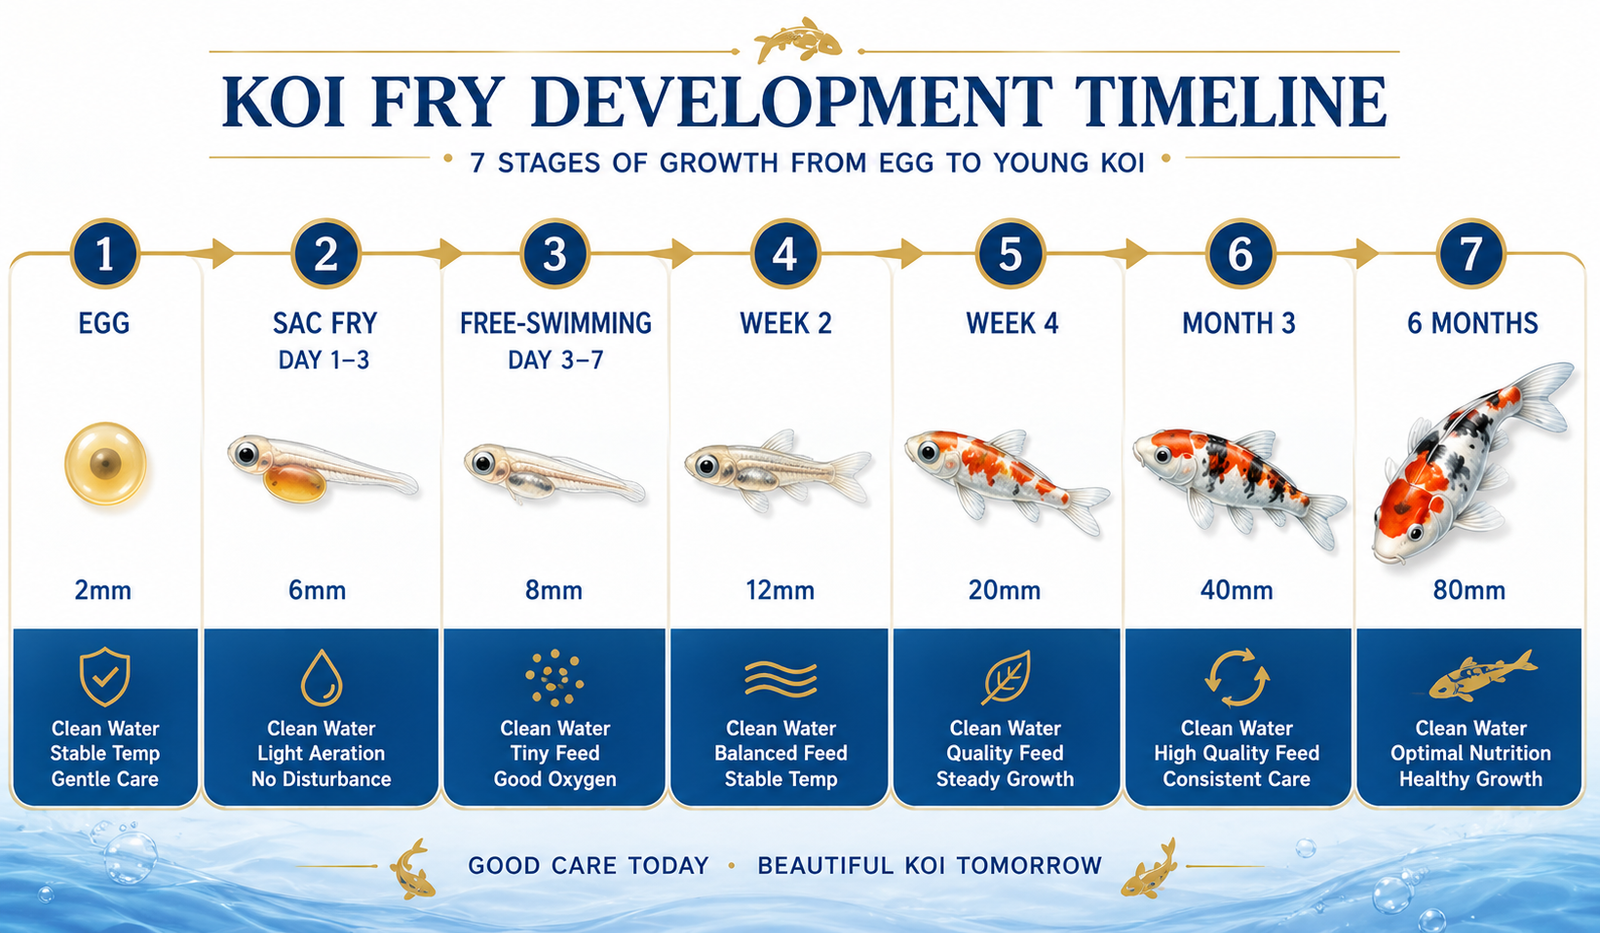
| Stage | Approximate Size | Appearance | Key Events |
|---|---|---|---|
| Egg | 1.5–2 mm | Clear/amber; adhesive; embryo visible Day 2 | Fertilization; embryo development |
| Sac fry (Days 1–3) | 5–7 mm | Thread-like; transparent; attached to surfaces | Yolk sac absorption; no independent feeding |
| Free-swimming fry (Days 3–7) | 7–10 mm | Tiny fish shape; mostly transparent | Begin active feeding; survival of fastest starts |
| Week 2 | 10–15 mm | Developing fins, some dark pigmentation | Rapid growth if feeding well; size selection begins |
| Week 3–4 | 15–25 mm (0.6–1 inch) | Clear koi shape; first color patterns appearing | First culling window — deformities visible |
| Month 2–3 | 1–2 inches (25–50 mm) | Colors developing; pattern increasingly visible | Second culling — pattern and color selection |
| 6 months | 3–4 inches (75–100 mm) | Established color and pattern | Third culling — final quality selection |
| 1 year | 6–10 inches (15–25 cm) | Near-adult appearance; colors deepening | Grow-out evaluation; sale or permanent placement |
Culling: The Most Important Step Most Beginners Skip
Culling — the selective removal and humane euthanasia of fry that don’t meet quality standards — is the practice that separates hobbyist koi breeding from quality koi breeding. It is also the step most beginners struggle with emotionally, and the one that matters most.
Why culling is essential:
- Resource competition: 1,000 fry competing for food and space grow more slowly than 100 well-fed fry. Culling dramatically improves growth rates for the survivors.
- Deformity removal: Spine curvatures, missing fins, deformed mouths, and color abnormalities typically indicate genetic or developmental problems. These fish are unlikely to improve.
- Quality improvement: Every generation that only retains the best specimens gradually improves the overall quality of the breeding line.
- Pond capacity: Your pond has a fixed capacity — keeping poor-quality fish takes space from high-quality ones.
What to Cull at Each Stage
| Age | Cull These | Keep These |
|---|---|---|
| 4–6 weeks | Spinal deformities, missing fins, no color developing on metallic varieties | Well-formed body, active feeding, normal swimming |
| 2–3 months | Poor color distribution, muddy patterns, slow growth, wrong variety traits | Clear color development, well-defined patterns, good body depth |
| 6 months | Below-average color quality, poor body shape vs rest of group | Top 20–30% by color quality and body conformation |
Humane Culling Method
The most humane culling method for fry is clove oil (eugenol) — add 40 drops per liter of water to induce rapid, painless anaesthesia followed by euthanasia. Never cull by flushing, releasing into waterways (illegal in many jurisdictions), or feeding to other fish while alive. If fry are healthy but simply surplus to your needs, giving them away to other hobbyists is a good alternative for non-deformed fish.
Koi Genetics Basics for Breeders
You don’t need a genetics degree to breed koi, but understanding a few basics helps set realistic expectations about what your spawn will produce.
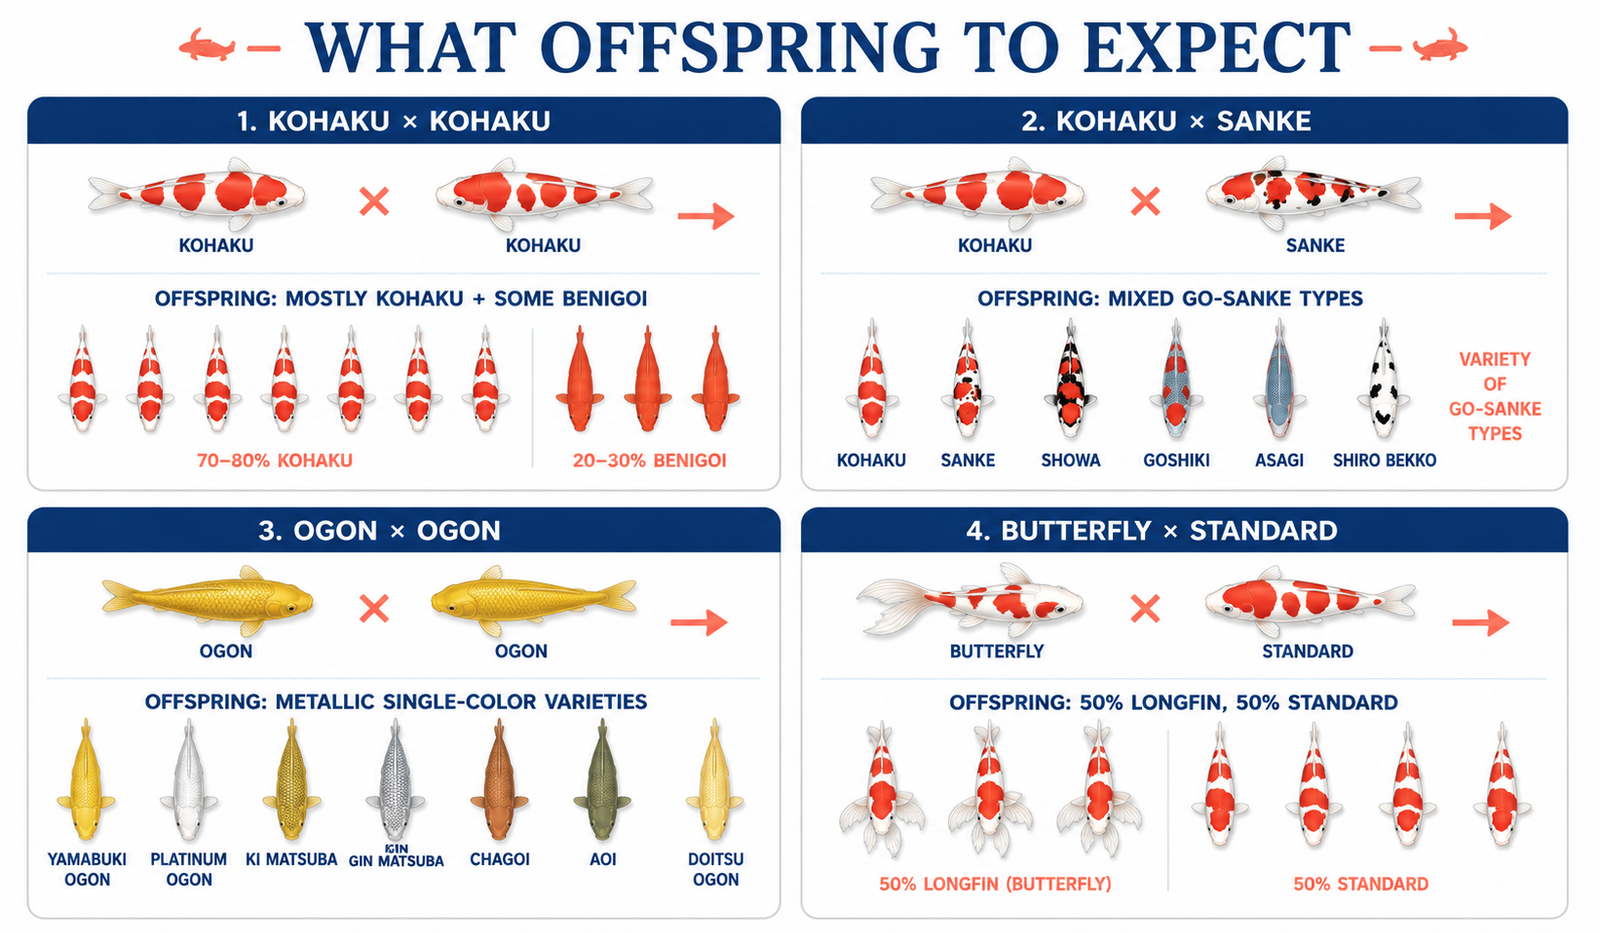
| Parent 1 | Parent 2 | Expected Offspring (approximate) |
|---|---|---|
| Kohaku × Kohaku | Kohaku × Kohaku | Mostly Kohaku patterns; some all-red (Benigoi) and all-white; occasional Sanke if Sanke genetics are present |
| Kohaku × Sanke | Kohaku × Sanke | Mix of Kohaku, Sanke, and plain red/white offspring; some black-heavy fish |
| Ogon × Ogon | Ogon × Ogon | Mostly single-color metallic offspring; high proportion of Ogon-type fish |
| Showa × Kohaku | Showa × Kohaku | Very mixed spawn — Kohaku, Showa, Sanke types plus many culls; highly variable |
| Butterfly × Standard | Butterfly × Standard | Approximately 50% longfin, 50% standard fin offspring; color patterns from both parents |
The key genetic reality of koi breeding: Even professional breeders with decades of experience and champion bloodlines produce only a tiny fraction of truly exceptional fish from each spawning. Most fry — even from excellent parents — will be average or below average. Exceptional offspring are rare, and that rarity is exactly what makes them valuable. Be prepared to cull 80–95% of your spawn and to consider any resulting quality fish a success.
Common Breeding Problems & Solutions
| Problem | Likely Cause | Solution |
|---|---|---|
| Koi won’t spawn | Water too cold, fish not conditioned, wrong ratio, wrong season | Raise temperature to 68–72°F; condition for 4–6 weeks; check male:female ratio |
| All eggs turn white | All eggs unfertilized — poor male sperm quality or wrong ratio | Use 2–3 males per female; ensure males show breeding tubercles (sexual readiness) |
| Eggs covered in fungus | Unfertilized eggs spreading fungus to fertilized ones; temperature too low | Remove white eggs immediately; add methylene blue; maintain 68–72°F |
| Fry die en masse in Week 1 | Ammonia spike from overfeeding or decaying eggs | Test water immediately; 30% water change; reduce feeding drastically |
| Female injured after spawning | Aggressive male chasing; rough spawning activity | Move female to recovery tank with 0.1% salt; treat any open wounds with Melafix |
| Poor color in offspring | Genetic mismatch; poor parent selection; inbreeding | Use unrelated parents with documented color lineage; cull heavily; accept natural variation |
Related Reading on Giobel Koi Center
Frequently Asked Questions
When do koi fish breed?
How many eggs does a koi fish lay?
How long does it take for koi eggs to hatch?
What do you feed baby koi fry?
Do koi eat their own eggs?
What is culling in koi breeding?
How old do koi need to be to breed?

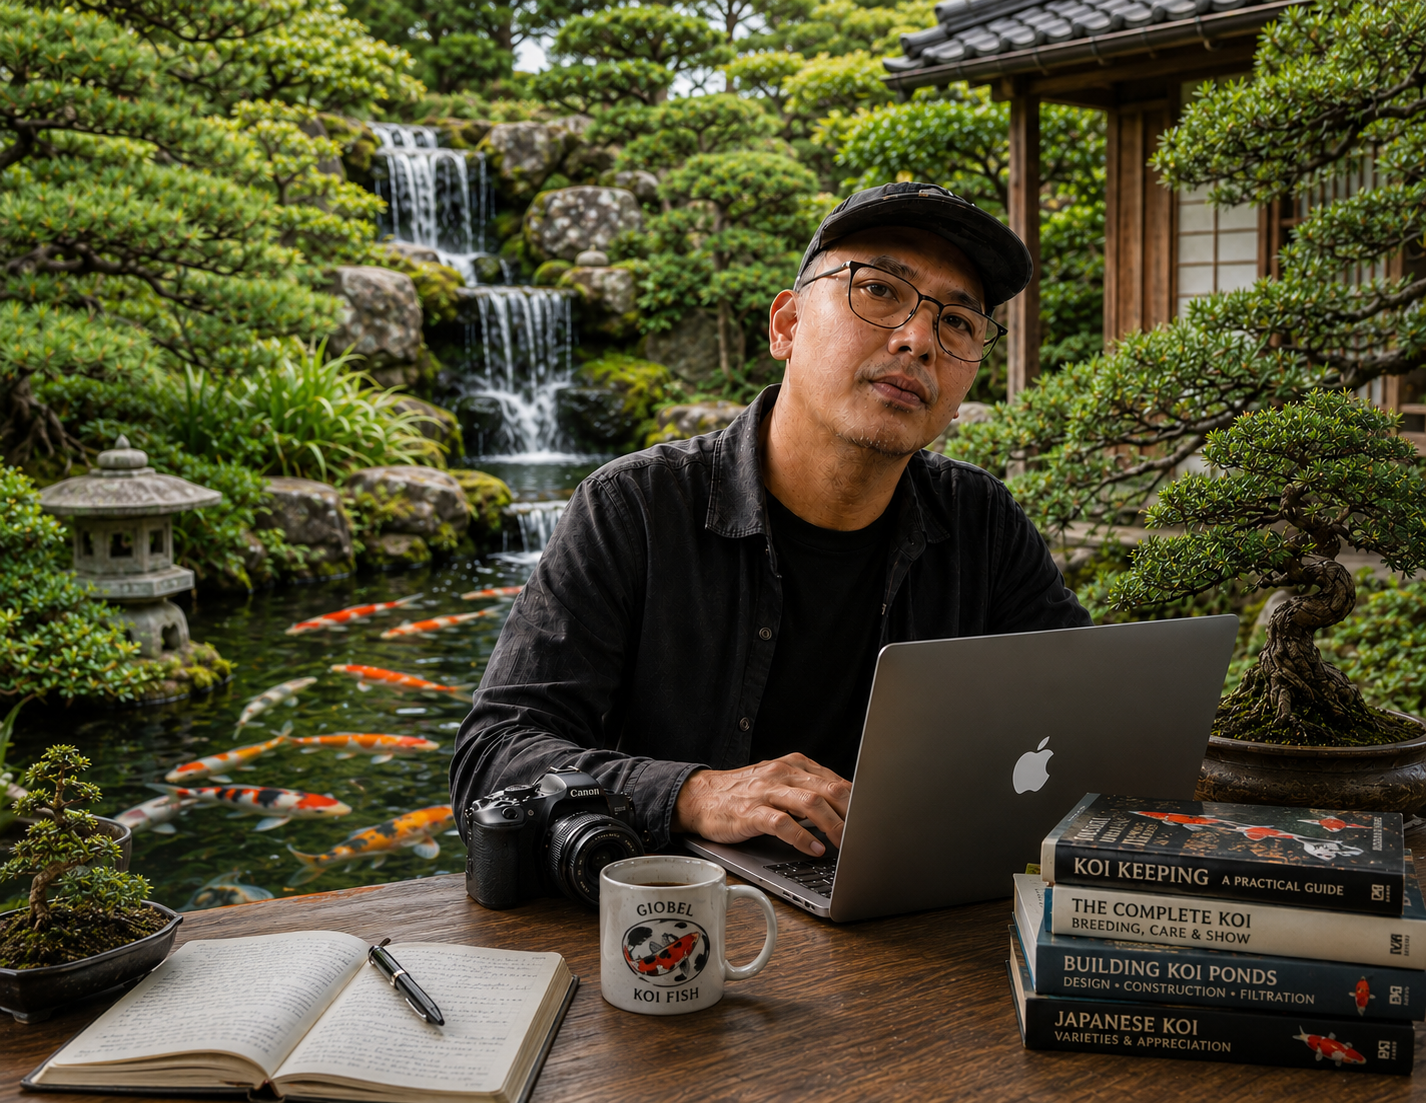
Giovanni Carlo
Koi keeper & breeder, Giobel Koi Center · Labangan, Zamboanga del Sur
Giovanni has been keeping and breeding koi since the 1980s on his farm in Mindanao. He has bred multiple koi varieties across dozens of spawning seasons and writes from decades of hands-on experience with parent selection, fry rearing, culling, and the rewarding unpredictability of koi genetics.


Passionate about fish keeping since elementary school in the 1980s, Giovanni Carlo has dedicated countless hours to collecting and breeding a diverse array of ornamental freshwater fish. From vibrant guppies and majestic koi to striking bettas and classic goldfish, he continues to explore the fascinating world of aquatics, sharing knowledge and enthusiasm with fellow fish enthusiasts.