Quick Answer
Start a koi fish drawing with a curved “gesture line” capturing the fish’s swimming motion before adding any shapes — this single step is what most beginner tutorials skip, and it’s the difference between a stiff-looking koi and one that reads as actually swimming. From there, build the body around that line, add fins and barbels, then color using a real pattern reference like Kohaku (red and white) or Showa (black, red, and white) rather than freehanding the colors.
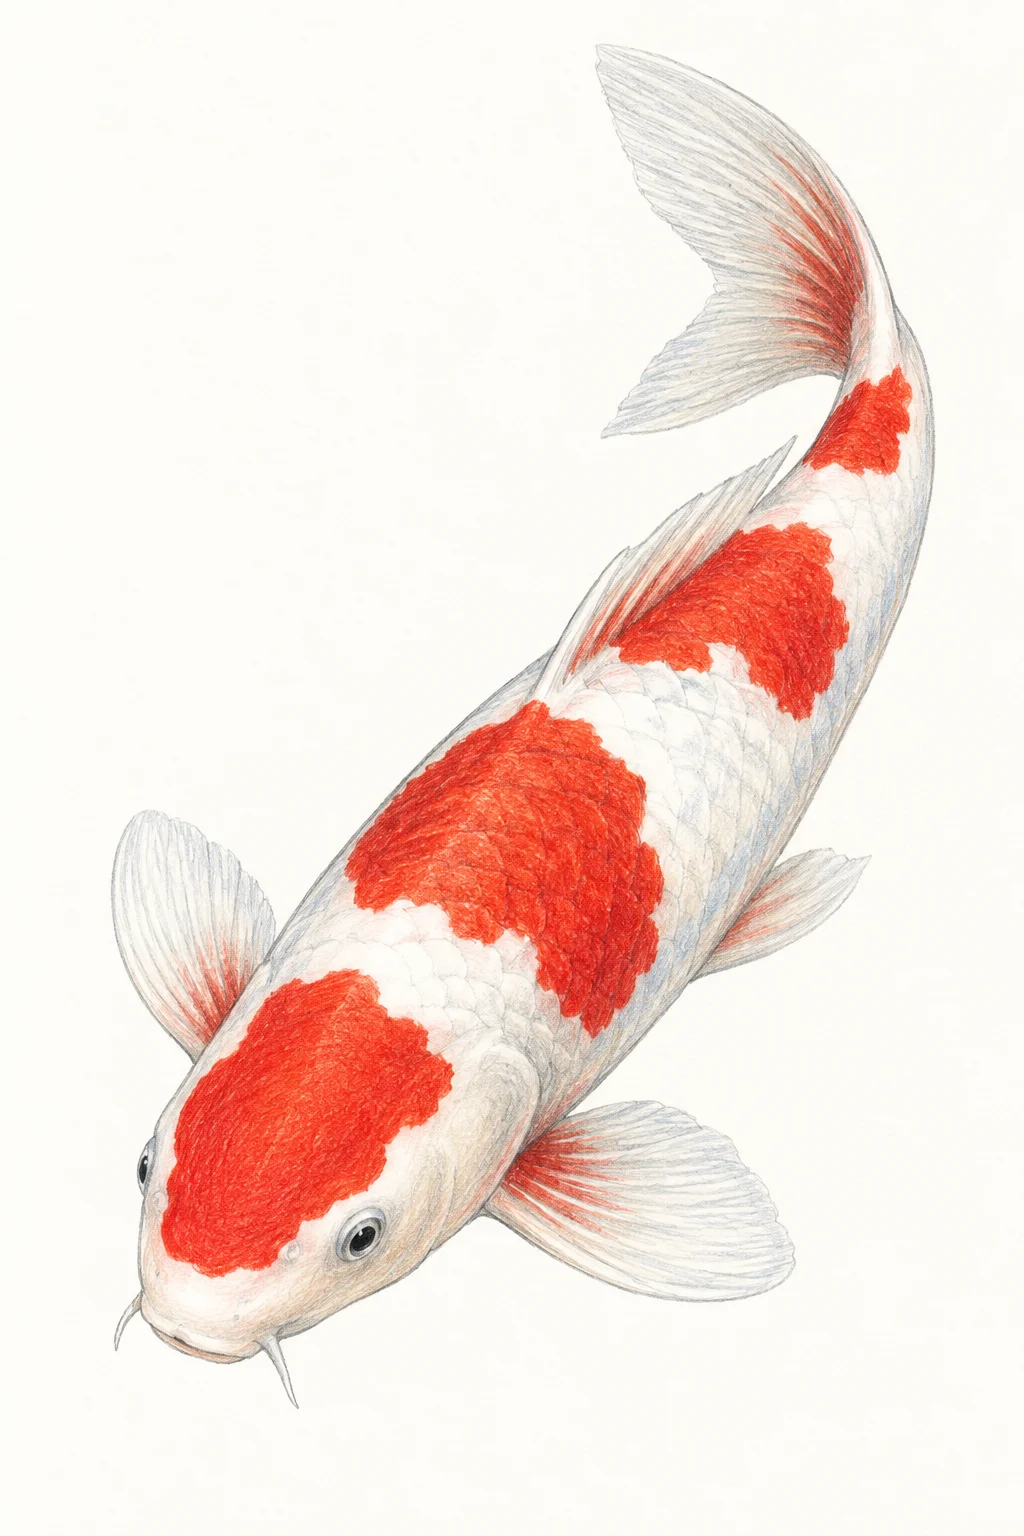
Koi fish are beautiful, graceful creatures that have been admired in art for centuries, and drawing one is a genuinely rewarding beginner art project. This guide covers the basics with simple materials — no advanced technique required, just a pencil, some patience, and (this part matters more than people expect) a moment spent capturing the fish’s motion before you draw a single shape.
Materials Needed
- Pencil
- Eraser
- Drawing paper
- Colored pencils or markers
A 48-count pre-sharpened colored pencil set is a solid, affordable starting point — enough color range to handle koi’s reds, oranges, whites, and blacks without needing a huge professional set right away.
Step-by-Step Guide
1. Start with a Gesture Line, Not a Shape
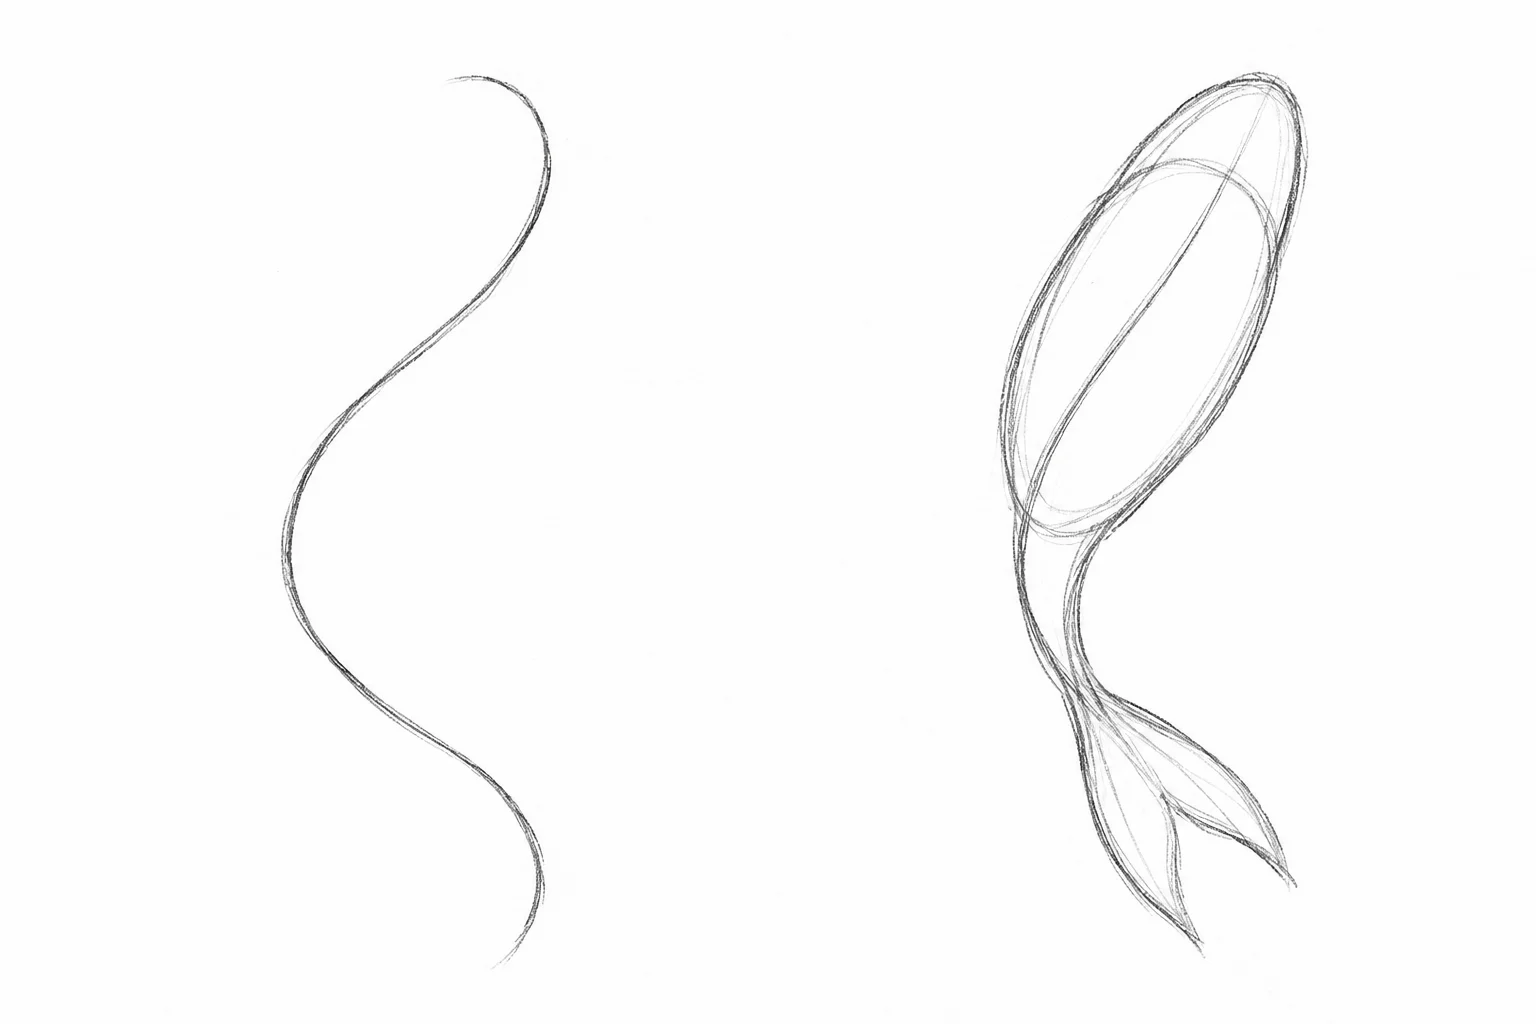
Before drawing any shapes, sketch a single loose, curved line that captures how the koi is moving — an S-curve works well, since koi rarely swim in a perfectly straight line. This is the step most beginner tutorials skip entirely, and it’s the single biggest factor in whether your finished drawing looks alive or stiff. Take a few seconds here; don’t worry about precision yet.
2. Build the Basic Shapes Around It
Following your gesture line, draw a long oval that tapers toward the tail for the body, a triangular shape for the tail itself, and a circle for the head. As a proportion guide, the head typically takes up about 20% of the total body length — keep the head circle smaller than beginners often expect.
3. Add Details to the Head
Draw almond-shaped eyes toward the top of the head, a mouth with a slight curve, and the pectoral fins on each side of the body just behind the head. Koi also have barbels — small whisker-like feelers near the mouth — which add a nice authentic touch many beginner drawings skip.
4. Outline the Body and Tail
Using your basic shapes as a guide, outline the body and tail with smooth, flowing lines. Use light pencil pressure so mistakes are easy to erase as you refine the shape.
5. Add Details to the Fins
Draw the dorsal fin on top of the body and the anal fin underneath, then the triangular caudal (tail) fin at the end. Add thin lines extending from each fin (called rays) for a more realistic, less flat look.
6. Add the Scales
Use small, curved, overlapping lines to suggest scales across the body — you don’t need to draw every single scale individually; a partial, evenly spaced pattern reads just as well and is far less tedious.
7. Color the Koi Fish, Using a Real Pattern as Reference
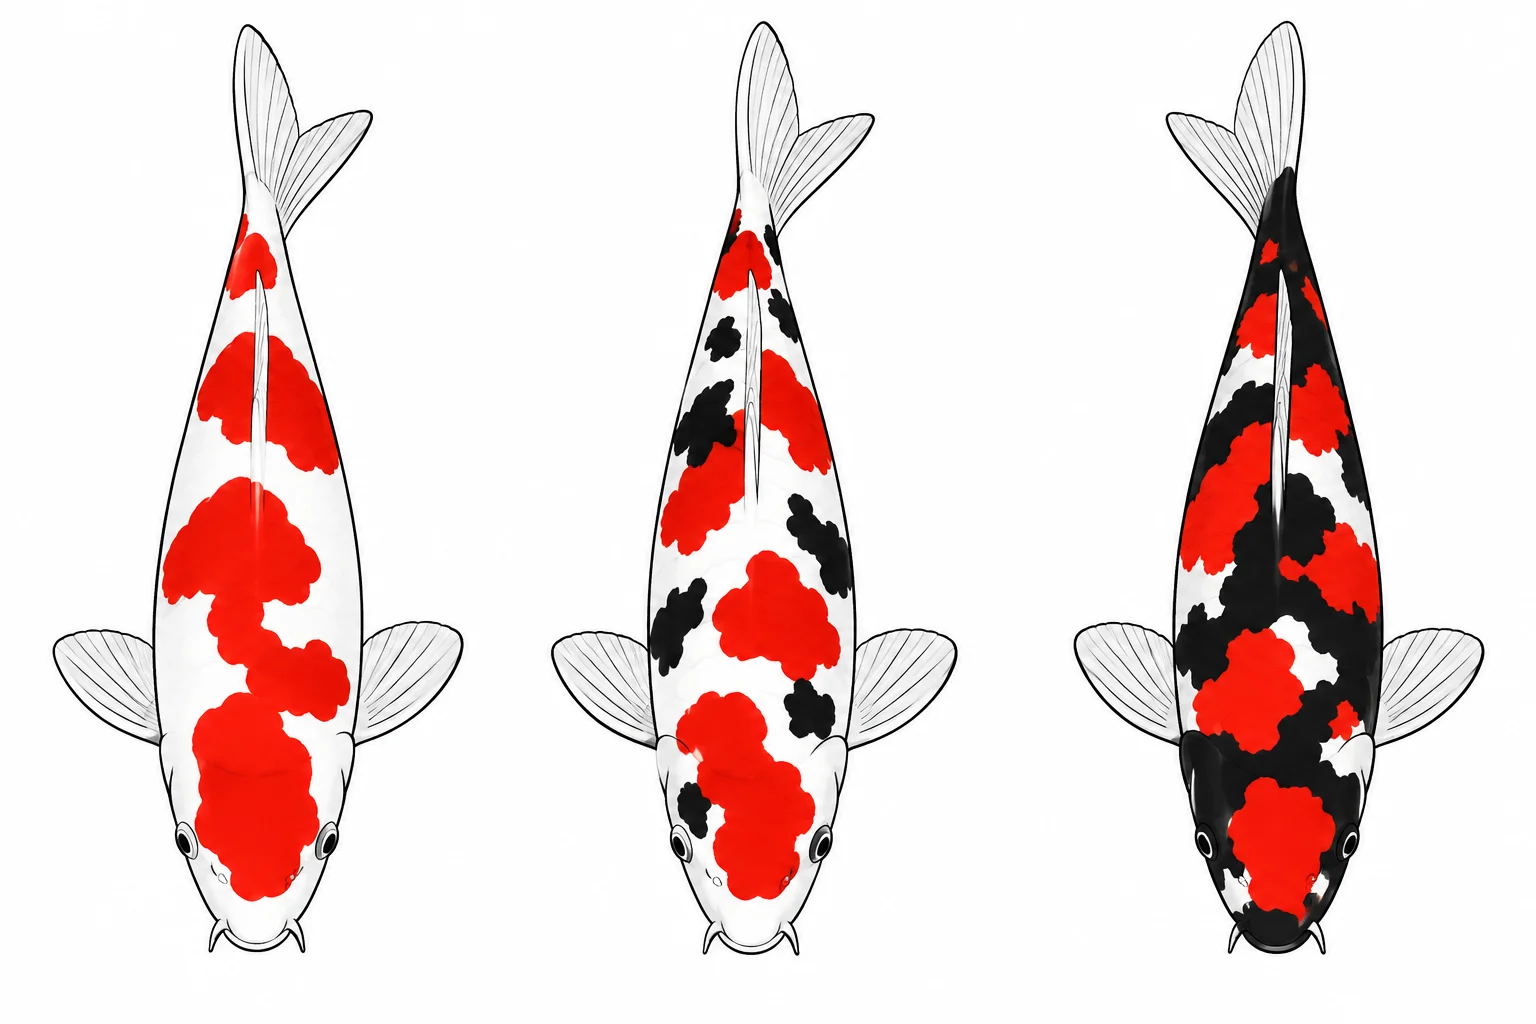
Rather than freehanding random color placement, base your pattern on a real, recognizable koi variety — it makes the finished drawing read as authentic rather than arbitrary:
- Kohaku — white body with red (hi) patches
- Sanke — white body with red and black accents
- Showa — a black base with red and white markings layered over it
Keep pattern edges irregular and asymmetrical — real koi markings are almost never perfectly symmetrical, and asymmetry actually makes a drawing look more natural, not less polished. Use lighter shades for the underbelly and darker tones on top for a sense of dimension, and add soft shading along the body’s curve to suggest form.
8. Final Touches
Step back and check the drawing as a whole — touch up any areas that need more definition, and erase any stray guideline marks still visible. A few soft ripple lines or bubbles around the fish can help it feel like it’s actually swimming in water, rather than floating on blank paper.
Frequently Asked Questions
What’s the easiest way to make a koi fish drawing look like it’s swimming?
Start with a curved gesture line before drawing any shapes — this captures the fish’s motion and pose from the very first mark, which is far more effective than adding curves and bends after the body shape is already locked in.
What koi pattern should beginners use for coloring?
Kohaku (white with red patches) is the simplest and most beginner-friendly, since it only uses two colors. Sanke and Showa add black accents once you’re comfortable with the basic two-color pattern.
Do koi fish drawings need to be viewed from the side?
No — a top-down view is actually more common in koi art, since that’s how people usually see koi in a pond. A side view is easier for beginners to start with, but a top-down angle can look more authentic once you’re comfortable with the basic shapes.
You may also like
Also check out our koi fish paintings in our shop.


Passionate about fish keeping since elementary school in the 1980s, Giovanni Carlo has dedicated countless hours to collecting and breeding a diverse array of ornamental freshwater fish. From vibrant guppies and majestic koi to striking bettas and classic goldfish, he continues to explore the fascinating world of aquatics, sharing knowledge and enthusiasm with fellow fish enthusiasts.